A new educator's first foray into modern media

Category: Uncategorised

Hoop Check In – Week 9

Things I’ve Learned

The semester is drawing to a close, and as I prepare to wrap up my Free Inquiry project, I’d like to take a moment to summarize my learning thus far.

As I’ve stated before, it’s more difficult for me to reflect on my learning and make it visible when I’m working on a physical skill and not academic research.  I’ve been watching and learning, rather than gathering prior research. I’ve been seeking advice, rather than gathering data. And, very importantly, I’ve been gaining an understanding of physical limits (mine and gravity’s), rather than analyzing observations. I’ve learned a lot about my strengths and weaknesses, and how to learn by experience.

Along with my latest progress video (the entire routine through with music for the first time), here are a few practical things I’ve picked up along the course of this project that I think apply to life in general:

  1. You can substitute strength for flexibility when it comes to showmanship…but you still need to work on both.
  2. It is 100% harder to resist gravity when spinning very fast.
  3. You can condition and you can gain calluses, but in order to put on a good show, some things are going to hurt very badly no matter what.
  4. Covering up doesn’t always prevent you from getting burned.
  5. Leaning into every move makes it look more intentional.
  6. Always think of what to do with your hands.

And without further ado, my progress so far:

Video taken by Eve Carty at Studio 4 Athletics. Used with permission.

Hoop Check-In – The Process

I have very little new developments to report this week, since I only had time to get to one hoop class and I’ve been held up with other schoolwork. So instead of a check-in video, this week I’m going to share with you a bit of my process. I’ll make up for it next week with (hopefully) some real live footage of me building my routine.

Choreographing a dance, or any kind of routine, is something I’ve never done before. I always thought it was some kind of alchemy that needed an expert to pull off. However, when the only person I’m choreographing for is me, I thought it might be easier since I know what my own limitations are. However, the disadvantage of choreographing for aerial apparatus is that I can’t just practice at home (I’ve been tempted to get out to a local playground and try the monkey bars, but it isn’t quite the same). Whatever advantage I have for knowing my own limits is erased by the fact that, until now, it’s all being done in my head. Trying to estimate the time it takes me to do certain tricks in order to time moves to music is hard when I’m not physically able to try it out.

So, where to start? I started looking online and found a few good resources for amateur choreographers (this one gets special mention), but this post on a blog called Steezy really stood out as something I could work with. They lay out choreography in 6 ‘easy’ steps, all of which apply to the process I’m hoping to undertake. There are helpful fun videos embedded (like the one below, based on Step 4), and some great examples. A good example of a multimodal blog!

The first step (pick a song and listen to it a lot) is completed. I’ve picked a few lyrics in the song that I want to link to my movements, and a few more dramatic points to fit with a fast or slow move.

The second step (get actively inspired) I’ve begun by putting together a list of moves that I can do, and starting to applying them to key points in the song that I think they go well with. Adding emotion is something I’ve been working on in my aerial hammock classes, and I’m still not very good at it. Adding pauses for effect will help to fill out the song and give me breaks, so I’m going to try that as a way to add emotion. For instance, just sitting in the hoop doesn’t look very cool, but if the hoop is slowly spinning and I can portray some drama with arm motions or positioning of my legs, it can work with the song while giving me a moment to catch my breath before the next difficult (and painful) drop or inversion.

The third step – freestyling – I have been doing at my weekly classes by practising skills and learning new ones. I’m hoping to try the routine in a real hoop for the first time at a special session with my instructor. In that space, I will be able to videotape some of my attempts so I can work on my video editing!


Environmental Apps for Place-Based Learning

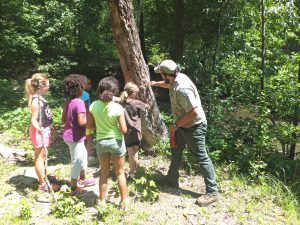
Photo taken by Virginia State Parks on Flickr, under Creative Commons license CC BY 2.0.

The four of us (Kay, Kat, Caitie, Kate, and Brigitte) are looking into ways to incorporate place-based learning into our classes. We have diverse teachable areas, but we’re all interested in helping our students get more in-touch with nature and with the local species in their area. in my personal experience (Kat), knowing more about the natural world around me helps me feel more at home in a place, and better able to connect to it. As we get more and more involved in technology in the classroom, we all wanted to ‘take a step outside’, so to speak, and think of ways to use technology to get more in touch with sense of place.

The following is a list of nature apps that we know of, and might be exploring this term:

iNaturalist/Seek

Lifescanner

Merlin Bird ID

Picture Insect

eBird

Leafsnap

Seaweed Sorter

And more that we will find over the next week or so! Our current plan is to investigate each app and rate them on usability, quality of database, value-for-price, and number of applications to a class or unit. This will get tweaked in the coming weeks as we talk more about our plans, so stay tuned!


Kahoot! In Classrooms – Pros and Cons

A Quick Run-Down

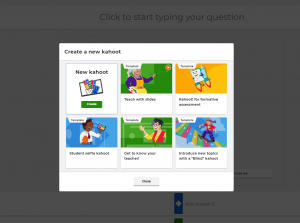
Kahoot! is a game-based learning platform that can be used for formative assessment in classrooms. It is becoming popular in secondary schools and has potential to be useful for all teaching disciplines, and even out-of-class activities like coaching, field trips, and anywhere that students have their phones (which is, let’s be honest, all the time). So far, Kahoot! has gained a billion players in the six years it’s been around.

In Kahoot!, teachers create a quiz and students are able to access and answer the quiz questions on a mobile device or tablet. Each student’s score depends on both who answers first, and how long it took to answer (time elapsed).


A recent study showed that students given either a single Kahoot! game or several games in a few weeks had the SAME level of increased engagement and interest in the class (Wang 2015).


Pros

  • It doesn’t have to be a competition between individuals. Students can work in teams.


  • Adding some good-natured competition is a good way to keep students engaged and encourage them to have fun with classmates they might not talk to normally.


  • It lets the educator get a quick ‘pulse’ from your class in terms of comprehension, preconceived notions about a topic, or how students feel they are progressing.


Cons   

  • You need to set it up and make sure all your students have access to a phone or tablet. If some students don’t have access to a mobile device, you will have to provide tablets.


  • You need wifi (or data) to use it, and if you’re in a place where wifi is spotty, it might not work. James even mentioned that sometimes a team can lose the game just because they’re sitting in the corner of the room with the worst reception, which isn’t fair.


  • Students can create their own usernames, which leaves it open to inappropriate language. That said, you can turn them away if they try to sign up with a name you don’t approve of.

Let’s Give It a Try!